Once Upon a Piece of Paper


once-upon-a-piece-of-paper

I was so excited about Andrea D’Aquino‘s new book on collage making that I ordered it two months before it was released… something I rarely do. But I had previously acquired her illustrations in Alice in Wonderland (read my review here) and follow her art on Pinterest and Instagram, so when I saw she was coming out with a how to book “Once Upon a Piece of Paper” I was quick to get in line!

A quote from the book:

“Use imperfection to your advantage”

Andrea D’Aquino does this beautifully. One thing I love about her collage works is that they feel much less calculated than most collage, and certainly more than mine.  I admire the child like freeness she exhibits… a paper version of intuitive painting.

20161006_224131

The book is chock full of advice, and her words of wisdom for approaching creativity.

20161006_224143

But she doesn’t stop there, she also gives a lot of practical how to tips, like this page on how she creates her patterned papers…

20161006_224200

….AND she gives her readers a jump start with a lovely pad of her own designed paper to use!  So far I have just flipped through admiring the papers, but I will dive in and use them as she intended one of these days!

81xd77reypl

For all of you collage artists, or wannabes, this is an inspiring little book!  Head to your favorite bookstore to pick one up, or it is available on Amazon if you would like to order!

October Workshops

There are so many fun workshops coming up at Tessera Fine Art Gallery in October!

day-of-dead-atc

Starts off TODAY with a Day of the Dead themed artist trading card workshop.  It will kind of be the debut for my newest stencil set of nine Day of the Dead stencils perfectly sized for Artist Trading Cards (ATCs).  They are also handy for any small project.

day-of-dead-stencil-set

If you live near Wichita, they are available at Tessera Fine Art Gallery.  If not, they are also available in my etsy shop.  Here is the full set:

day-of-the-dead-atc-stencil-watermark

Next up will be making and using acrylic skins:

flyer

Followed on Saturday the 8th with two different back to back workshops on Mastering the Mediums and Tangible Textures.  Both with fun take home projects.

mastering-the-mediums

tangible-textures-flyer

Call the gallery at (316) 262-2435 to sign up for any of these workshops!

Hope you have a lovely Saturday!

Paint organization

I know that many, many artist’s have Ikea’s Raskog cart as part of their studio essentials.  I use mine to store my paint so that I can wheel it to wherever I am working.  This week, during a much needed cleaning spree, I decided to get my paints more organized.  Specifically, I was using the top shelf of the cart for my fluid acrylics, and the second shelf for my tubes of heavy body acrylics, which were a jumble that I had to sort through every time I needed some paint.  That is a waste of valuable painting time!

I decided to make myself a divider so that there would be eight sections to sort my paint into by color.  It only took a few minutes, making me wonder why I hadn’t done this sooner!

20160225_114136

All you need is some heavy cardboard, a ruler and scissors or a mat knife.

  1. Cut one piece of cardboard 3 x 16 inches.  This will go down the middle of the cart long ways.
  2. Cut three pieces of cardboard 3 x 11 3/4 inches.  These will be the side to side dividers.
  3. In the first piece, cut two inch notches every 4 inches.
  4. In the other three pieces, cut one two inch notch in the middle (about 5 5/8 inch)

20160225_105431

5. With the notches facing up on the middle piece, and down on the side to side pieces, slide your cardboard strips together to look like this:

20160225_110422

6.  I had to do a little trimming, but make sure that the pieces fit snugly in the tray,

7.  Fill with paint!  I sorted them into:

  • blacks
  • whites
  • reds
  • oranges and pinks

one one side, and on the other:

  • blues
  • greens
  • yellows
  • browns

I love it!  I still haven’t decided if I need to add labels on the outside of the cart for quick reference, but that will be easy to add later if I decide to.

20160225_112037

So beautiful and inviting!  And there is so much more room! Ahhhh, sometimes it is the little things that make life so much nicer!

Happy organizing!

New Stencil – Circus !

circus stencil copy

I have been having fun designing stencils the last couple of months, and just added a new one to my line up.  “Circus” makes a lovely background pattern on this journal page, with the help of some acrylic paint mixed with airbrush medium in mister bottles.  I like the resulting juicy look of the page.  To finish it off, I simply stitched a tiny little photo on with my sewing machine.

circus watermark

This stencil is currently available in 6 x 6 inch size in my etsy shop, or for local folks, look for all of my stencils at Tessera Fine Art Gallery in Wichita.

“Focus on the Negative” Reverse Painting Workshop

20150725_155610

Last week, I was privileged to teach a workshop on reverse painting… I called it “Focus on the Negatives” which is totally opposite of my general philosophy on life!  But in this case, by letting our beautiful backgrounds be the foreground and painting over the negative spaces in between, we created some unique and lovely work!

This was a hard working (playing?) bunch!

B1 b12 B11B6

B10 detailing B9 in progress B8 mother daughter b7 b4 B2

In the end, everyone seemed happy with their lovely creations…

B15 Group photo

If you are interested in hosting your own workshop like this, find out more here, or email me at victoryrd@hotmail.com

Stencil Cutting

wpid-img_20150704_155007.jpg

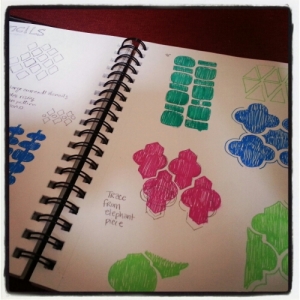
I use a lot of stencils in my artwork, so I have been wanting to make some new ones with designs specifically suited to my needs.  On recent car trips I spent some time sketching ideas.

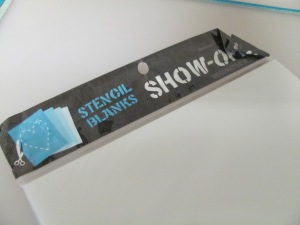
Once back home, I pulled out everything I would need to turn my ideas into stencils:

  • graph paper – makes laying things out uniformly much easier!
  • sheet of glass with duct tape around edges for safety
  • black marker
  • washi tape
  • hot knife tool

009

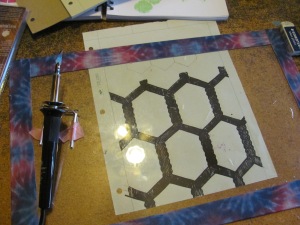
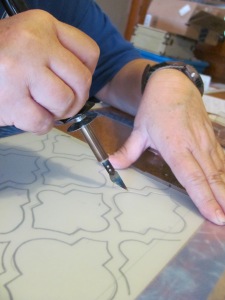
I drew out the design a little nicer than my sketches, and put this pattern underneath the glass.  Since the hot tool holder is pretty light weight and tends to slide, I taped it to the glass. This knife gets super hot and you don’t want it moving around unexpectedly!

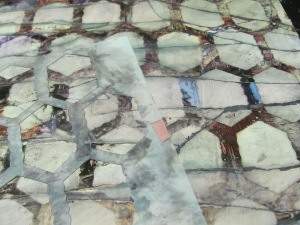
pattern and glass

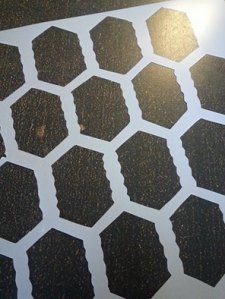
This stencil is supposed to end up looking like chicken wire. I want it for the background of a rooster piece.

chicken wire

And then for the test!

using the stencil

Yep, it works!

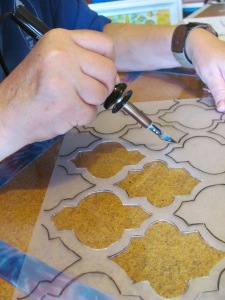
Now for another one…. I call this design Agra, because it makes me think of India.

getting started cutting with hot tool

What design would you love to make into a stencil?

Window with a View

Thanks to one of my “scouting” friends (those who keep their eyes out for treasures for me), I recently acquired some old windows.

windows

I was thrilled to get them because I have been hunting for four paned windows every since I sold this popular one with prints of my four season trees cut to size and mounted in the window panes.

window pane trees for etsy

The framing process is a little tricky when using old windows.  First, prepare the window by either removing loose flakes, or gluing them down, cleaning stray paint and years of dust and grime off of the glass, and repairing any loose joints.

IMG_5154

Then the prints must be resized to fit the window panes.  I have yet to find a window with standard art print sized panes!  My originals were 12 x 12 inches, so I had to do some cropping and photoshopping to get the right size of prints.

IMG_5153

Then it takes some careful trimming since the openings are rarely perfectly square.

IMG_5156

Once the prints are in, the same process has to be done with thick cardboard, making sure it fits tightly in each pane.

IMG_5162

Double check that everything looks right, then glue, kraft paper and a wire hanger finish off the back of the piece.

IMG_5157

Now it is done and ready to enjoy!

IMG_5265

Just want the prints to put in your own window frame? Visit my etsy shop.

Happy Birds

I finished up a new piece of art last week that I called “Happy Birds” because of the bright cheery colors in it.

Habby birds begun

I started with a wood panel that was actually an unfinished cabinet door.  I added scraps and bits here and there…some scraps of Citra Solv paper, magazine images, book pages, and sheet music.  Then I chose some sheets of deli paper that had been used to clean off stencils, or had a gelli plat print on them.

gelli plate papers

I tore these up and added them here and there to my mix. Next, I added acrylic paints, allowing the papers to peak through here and there.

background becoming

I pulled out some stencils to dab paint through, and to use spray inks on.

layers

Finally, on top of this I used a black china marker to make some marks, and dipped a hair roller in white paint and added circles.  Then, it was the simple matter of painting everywhere that was not a bird, the tree, or leaves!

Happy Birds watermark

Happy birds!

Original available at Tessera Gallery, Wichita, KS.

Prints available in my etsy shop.

“Harlequin Tree”

harlequin tree watermark med

Awhile back, I shared with you a technique using Citra Solv concentrated cleaner to alter National Geographic pages, but with a twist… first embossing a stencil design on the page, and then treating with Citra Solv.  Sometimes the technique results in a muddled mess, other times in gorgeous papers like this double page spread with diamond shaped designs.

20150218_151029 copy

A closer look:

20150218_151029 copy (1)

Sometimes I am so happy with the papers I just have to look at them for awhile… but the time had come to use these lovely pages.

First, I collaged, painted, and stenciled, and stamped a background on a wood panel. (and yes, the dots were made with bubble wrap!)

background

The bottom border of diagonals was already on the panel that I was upcycling, so I just added some more along the top.

Then, I cut the tree out of my beautiful papers and mounted it to the board.  I usually don’t draw out my trees, just take a pair of scissors and start cutting.  It does take a bit of concentration to keep track of where the branches are headed!

tree trunk

To this I added leaves cut out of a magazine page full of fall foliage.  I like the color that the fall trees gave my leaves.

leaves

I added some shading and dimension both with acrylic paint, and my beloved Derwent Inktense pencils.  Finally, I called it complete!

20150402_134309

If you want to read more about how I created these papers, go to this blog post.

Happy creating!

Somerset Apprentice Giveaway Celebration!

IMG_4718

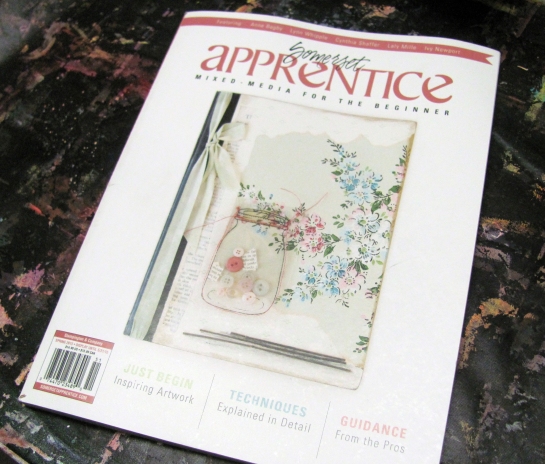
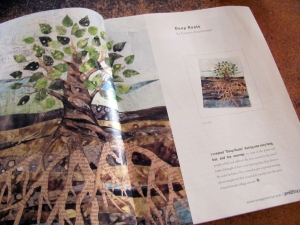
I am privileged to have the creation of my mixed media collage piece, “Deep Roots” as one of the featured articles in the current issue of Somerset Apprentice Magazine. It is pretty fun to see it in print, especially in such a lovely, high quality magazine!  I love all of the Stampington Company magazines, and this marks my 20th appearance in one of their many publications!

IMG_4698 IMG_4699

To help me celebrate, Somerset Apprentice has graciously offered a free issue to the winner of a drawing right here on my blog! All you need to do is leave a comment, and you will be automatically entered!  The winner will be randomly drawn from the pool, and notified via a reply comment.  You will email me your address, which I will pass on to Somerset Apprentice, and they will send you a complimentary issue ($14.99 value).  How fun is that?!

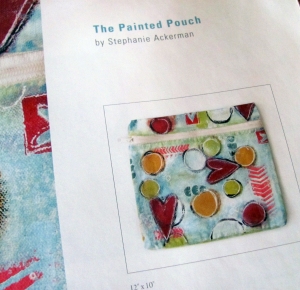
Besides some other great feature articles, like this one by Stephanie Ackerman on making a cute little painted pouch…

IMG_4711

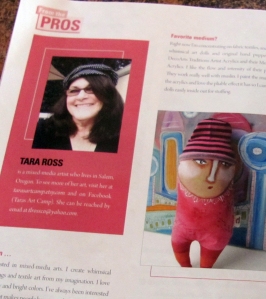
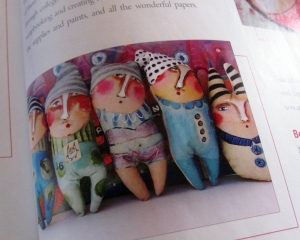
…there are segments called “from the pros” like this one about Tara Ross and her adorable painted fabric dolls.

IMG_4705 IMG_4704

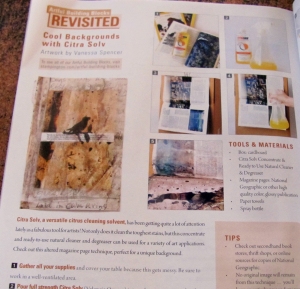
In the back are also some refreshers on basic techniques, like how to use Citra Solv to alter National Geographic pages, like I did for my Deep Roots piece, or how to stain papers with walnut crystals.

IMG_4703

So many great how to articles packed into these magazines, and loads of detailed photos.  I love having these magazines in my library to go back to again and again whenever I need a little inspiration or instruction.

So, be sure and leave your comment and watch for the winner to be announced on April 6!

Good luck!